HSE-RESULT ANALYSER PORTAL
------------------------------------------------------------------------------------------------------------------------------------------------------------------------------------
How to Run a Portable Version of Windows from a USB Drive:
Ever wanted a copy of Windows you can take with you wherever you go, to use on any computer you want? It's possible: here's how to install a portable version of Windows 8 on a USB hard drive that you can take anywhere.
Prerequisites
A Windows installation disc or ISO image. We recommend using Windows 8. Windows 8 will allow you to use your portable installation on any computer, but Windows 7 is not as portable and may have driver or activation issues if you use it on other computers. (If you must use Windows 7, this alternative method may be preferable).A USB drive. An external hard drive is preferred over a flash drive, since it will run significantly faster. USB 2.0 will suffice, but if you have a USB 3.0 drive, we recommend using it (though it will only work if you're installing Windows 8, not Windows 7).WinToUSB. This is the simple program that will walk you through the installation process.
Step One: Install WinToUSB
install WinToUSB
Step Two: Create Your Portable Drive
Next, you just need to start up WinToUSB and follow its (short) wizard to create your portable installation. There are only a few steps involved:
1. Select Your Installer Media
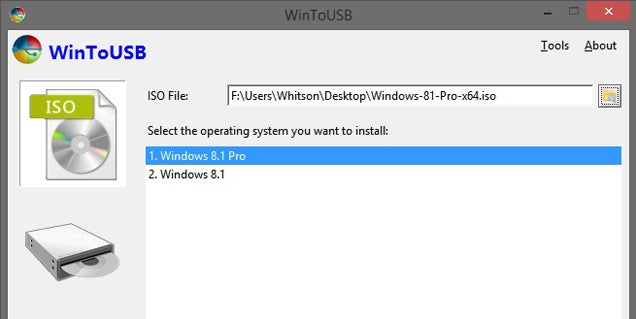
When you start WinToUSB, you'll be prompted to choose your ISO file or disc. Click the browse button to find it, select the operating system you want to install, then click Next.
2. Select Your Hard Drive
Next, you'll be asked to select your hard drive and choose the system and boot partitions. You can find more information about this here, but with a USB hard drive you should just be able to select the first partition as system and the second partition as boot, as shown above. Make sure your drive is formatted as NTFS.
3. Start the Installation
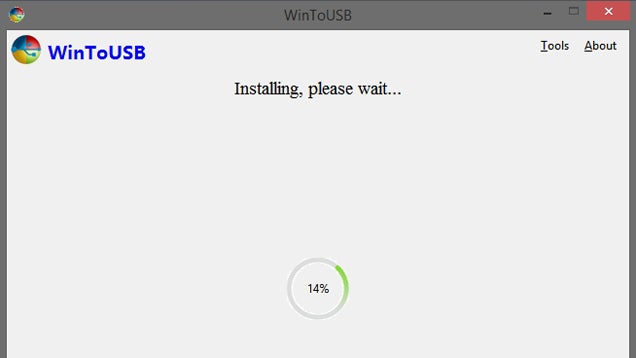
When you click next, the installation will begin. I found it only took a half hour or so, though your mileage may vary depending on the speed of your hard drive.
Done!
Step Three: Boot From Your Portable Drive
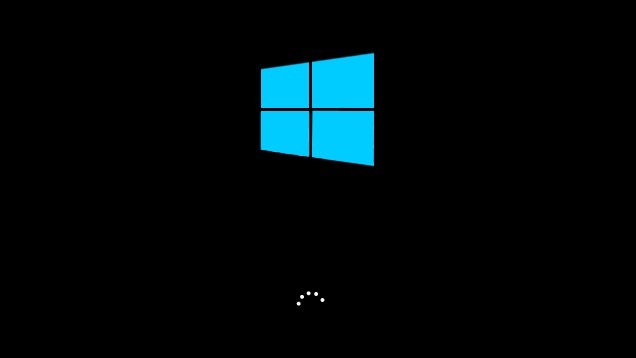
That's it! It's actually a very quick and easy process, and when it's done, you can start running your portable installation on whatever computer you want. To do so, just plug it in, restart the computer, and boot from the drive just like you would a CD or flash drive (on my computer, that meant pressing F11 at boot and choosing the drive from a list). The first time it starts, it'll install the necessary drivers and take awhile to boot, after which you can set up your machine just like you would a new Windows 8 PC. You may have to manually adjust some things like screen resolution, but once you're done, you can shut it down, move it to another computer, and run it from there. It may go through the driver installation step on each new computer (which means it'll take awhile to boot), but I found it moved between my two PCs quite well. Enjoy!
................................................................................................................................................................
How To Browse Your Linux Partition from Windows
You can download Ext2explore from HERE.
and runs on Windows XP SP3, as well as Vista and 7 OR 8 in compatibility mode.
There is no installation for the utility, so just unzip the file. You can give it its own folder, if you like. Ext2explore has a few compatibility issues, so let’s fix them first, shall we? Right-click the .exe file and go to Properties.

Then, click on the Compatibility tab.

Just double-click the program to launch it. You’ll get a security warning from Windows, to which you should respond Yes.

You should see the main Ext2explore window:


Then Right-clck and copy the file.done
-----------------------------------------------------------------------------------------------
How To Use WinSetupFromUSB To Create Multiboot Windows USB
This tutorial will show you
how to create multi-boot USB drive containing Windows 7 and Windows 8.1 installation files with the help of WinSetupFromUSB software.
Follow the given below instructions carefully to prepare your multi-boot USB drive containing Windows 7 and Windows 8.1 installation files.
Things you will need to prepare multiboot USB:
# Windows 7 ISO file# Windows 8/8.1 ISO file
# 8 GB+ USB drive (we recommend 16 GB for 64-bit Windows)
# A computer running Windows 7, 8, or 8.1
NOTE: You must have Windows 7 and Windows 8/8.1 ISO files. If you have Windows 7 or Windows 8.8.1 DVDs, you need to prepare an ISO file image out of the DVD first.
Procedure:
Step 1:Visit this page and download the latest version of WinSetupFromUSB file. Extract the compressed zip file to get a folder named WinSetupFromUSB with separate executable for 32-bit and 64-bit Windows.
Step 2: Connect your USB drive to the PC and backup all data to a safe location, as the drive will be erased before making bootable.
Step 3: Run WinSetupFromUSB. Note that if you’re on x64 bit Windows, please run the executable named WinSetupFromUSB x64. Click Yes button when you see the UAC dialog.
Step 4: Under USB disk selection and format tools section, select your USB flash drive that you would like to make multi-boot.
Step 5: Turn the option titled Auto format it with FBinst on and then select NTFS as the file system. Note that if you’re preparing this multi-boot USB to install Windows 7/8.1 on a UEFI based PC, you need to select FAT32 instead of NTFS.

Step 6: Under Add to USB disk section, check the box titled Windows Vista/7/8/Server 2008/2012 based ISO to see the browse button and then click the browse button to browse to your Windows 7 ISO image file. Select your Windows 7 ISO and then click Open button.
NOTE: If you have selected NTFS as the file system in Step 5, when you click the browse to select the ISO file, you will get a message saying that “If you need (U)EFI support for the 64-bit versions of Windows Vista SP1 or later, you must use FAT32 partition.”
 Step 7: Finally, click Go button to begin transferring Windows 7 setup files to your USB. Click Yes
button when you see the warning dialogs to continue. The process might
take 15-30 minutes depending on the version of Windows you’ve selected
and your PC’s hardware.
Step 7: Finally, click Go button to begin transferring Windows 7 setup files to your USB. Click Yes
button when you see the warning dialogs to continue. The process might
take 15-30 minutes depending on the version of Windows you’ve selected
and your PC’s hardware.

Once done, you’ll see Job done message.

Now that we have added Windows 7 installation files to the USB, it’s time to transfer Windows 8/8.1 files to the USB. Don’t disconnect the USB from the PC and also don’t quit WinSetupFromUSB.
Step 8: In this step, we’re going to add Windows 8/8.1 installation files to the USB. Select your USB drive and be sure to keep the option Auto format with FBinst turned off (selecting it will format the USB drive again, so be sure not to select it).
Step 9: Check Windows Vista/7/8/Server 2008/2012 based ISO file and this time, browse to your Windows 8.1 ISO file and click Open button to select it.
 Step 10: Finally, click GO button, click Yes
when you see two warning messages to begin transferring Windows 8/8.1
installation files to the selected USB. Once WinSetupFromUSB completes
its business, you’ll see Job done message. You can
safely remove the USB and then use it as multi-boot USB to install
Windows 7 or Windows 8/8.1. That’s it! Good luck!
Step 10: Finally, click GO button, click Yes
when you see two warning messages to begin transferring Windows 8/8.1
installation files to the selected USB. Once WinSetupFromUSB completes
its business, you’ll see Job done message. You can
safely remove the USB and then use it as multi-boot USB to install
Windows 7 or Windows 8/8.1. That’s it! Good luck!------------------------------------------------------------------------------------
NTLite: Ultimate Tool to Tweak and Customize Windows 7, 8 and 8.1 Installation
UPDATE: The first beta version of popular nLite tool for Windows 7, 8 and 8.1 has been released. It has been labeled as NTLite and available for download to public.Do you remember the good old days of Windows XP when you used to customize Windows XP setup ISO using nLite? nLite is one of the best and most popular Windows installation customization software which allows you to remove unwanted components from Windows setup, integrate device drivers, hotfixes and service packs in Windows setup and create unattended and bootable setup ISO of Windows OS so that you don't need to enter anything while installing Windows in computers.
With the help of nLite, users were able to decrease the size of setup ISO of Windows by deleting unnecessary Windows features and drivers which indirectly used to make installed Windows faster as less services were running in background.
But nLite was only available for Windows 2000, Windows XP and Windows Server 2003. The developer also released a separate version of this software called "vLite" to customize Windows Vista setup ISO.
Interested readers can read more about nLite and vLite at following links:
- nLite: Freeware to Create Unattended Setup ISO of Windows XP
- vLite: Freeware to Create Unattended Setup ISO of Windows Vista
Now its time to share some good news! "nuhi", the developer of nLite and vLite, has started working on a special version of nLite again. He is developing a new tool NTLite which supports Windows 7, Windows 8 and Windows 8.1.

With the help of this new tool, users can customize Windows 7, Windows 8 or Windows 8.1 setup ISO to remove unwanted components, slipstream service packs, updates and drivers, include Registry tweaks, create unattended and bootable ISO and much more.
Features list:
- Live install modification feature to customize already running Windows setup
- Unwanted Windows components removal
- Enable/disable default Windows features (the same as "Turn Windows features on or off")
- Hardware targeting to find missing drivers for your computer
- Drivers, updates, hotfixes and language packs integration
- Windows tweaks integration
- Automated deployment to create unattended installation disc
- Pending changes overview to review your changes before creating setup dis
Download NTLite for Windows 7,8 and 8.1
NitroShare, a cross-platform network file transfer app, now is under active development since the previous 0.2 release was announced 2 years and a half ago.
Nitroshare is a cross-platform network file transfer application designed to make transferring any file to any device as painless as possible. It features:
- Runs on Windows / Mac OS X / Linux
- Automatic discovery of devices on the local network
- Simple and intuitive user interface
- Transfer entire directories
- Completely free and open-source
Download Nitroshare for Windows from HERE
DOWNLOADS THOUSANDS OF FREE SOFTWARES FOR WINDOWS FROM HERE
WINDOWS8.1 TIPS & TRICKS
ഫോള്ഡറിനെ ഡ്രൈവ് ആക്കി മാറ്റാം !!! പാര്ട്ടീഷന് ചെയ്യാതെ മൈകമ്പ്യൂട്ടറില് എക്സ്ട്രാ ഡ്രൈവുകള് !!!READ MORE...
No comments:
Post a Comment